
With ConBee USB and deCONZ
Quick tutorial
- Plug in ConBee USB
- Install deCONZ
- Open deCONZ web-gui (Phoscon App)
- Add some lights, sensors or switches
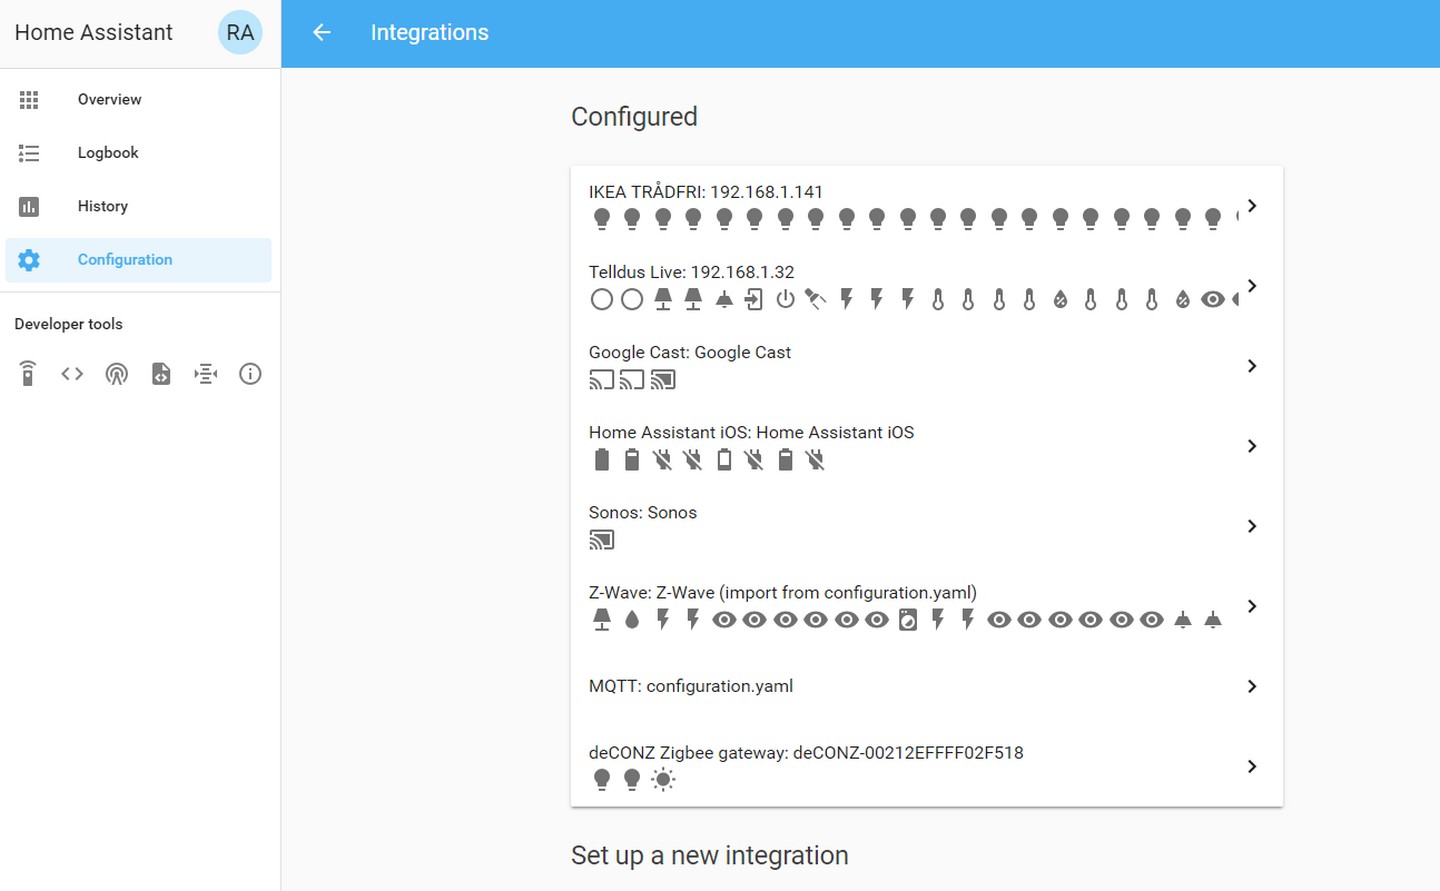
- Open Home Assistant -> Configuration -> Integrations
- Configure «deCONZ Zigbee gateway»
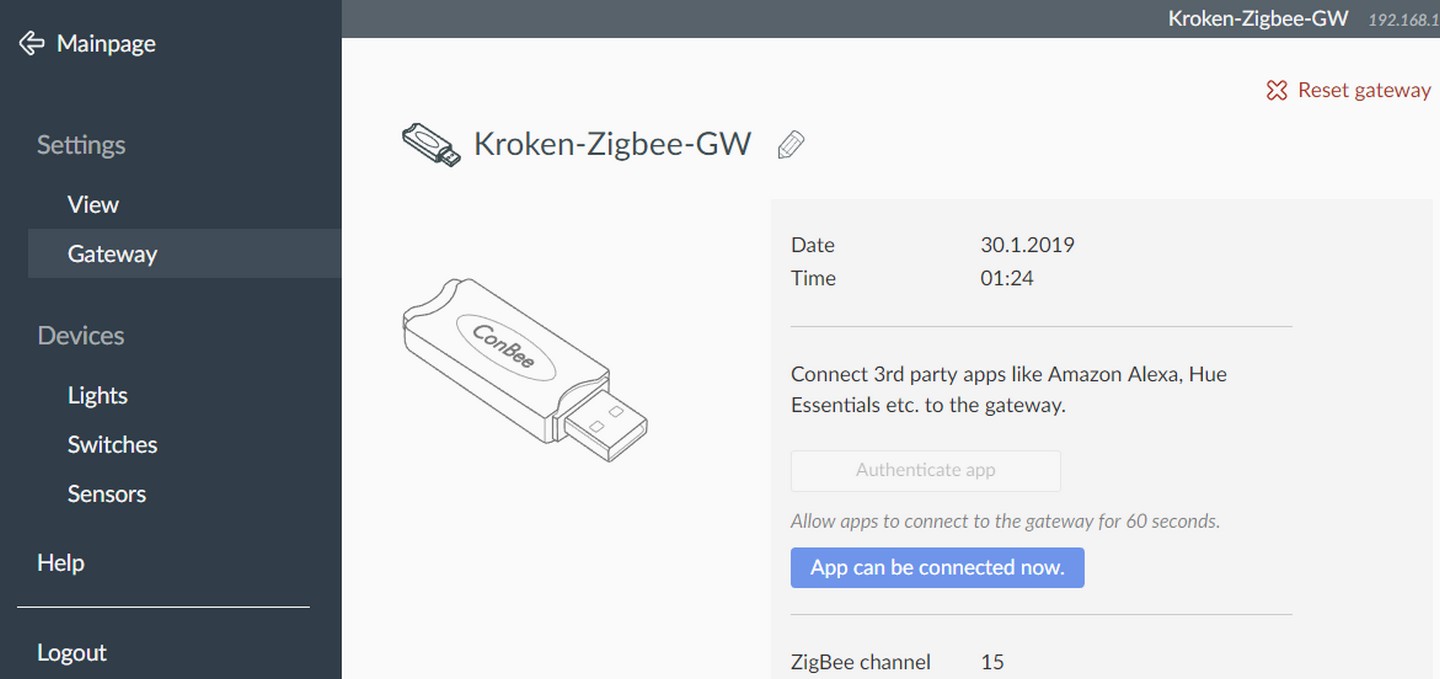
- Go back to the deCONZ web-gui (Phoscon App) -> Gateway -> Authenticate app
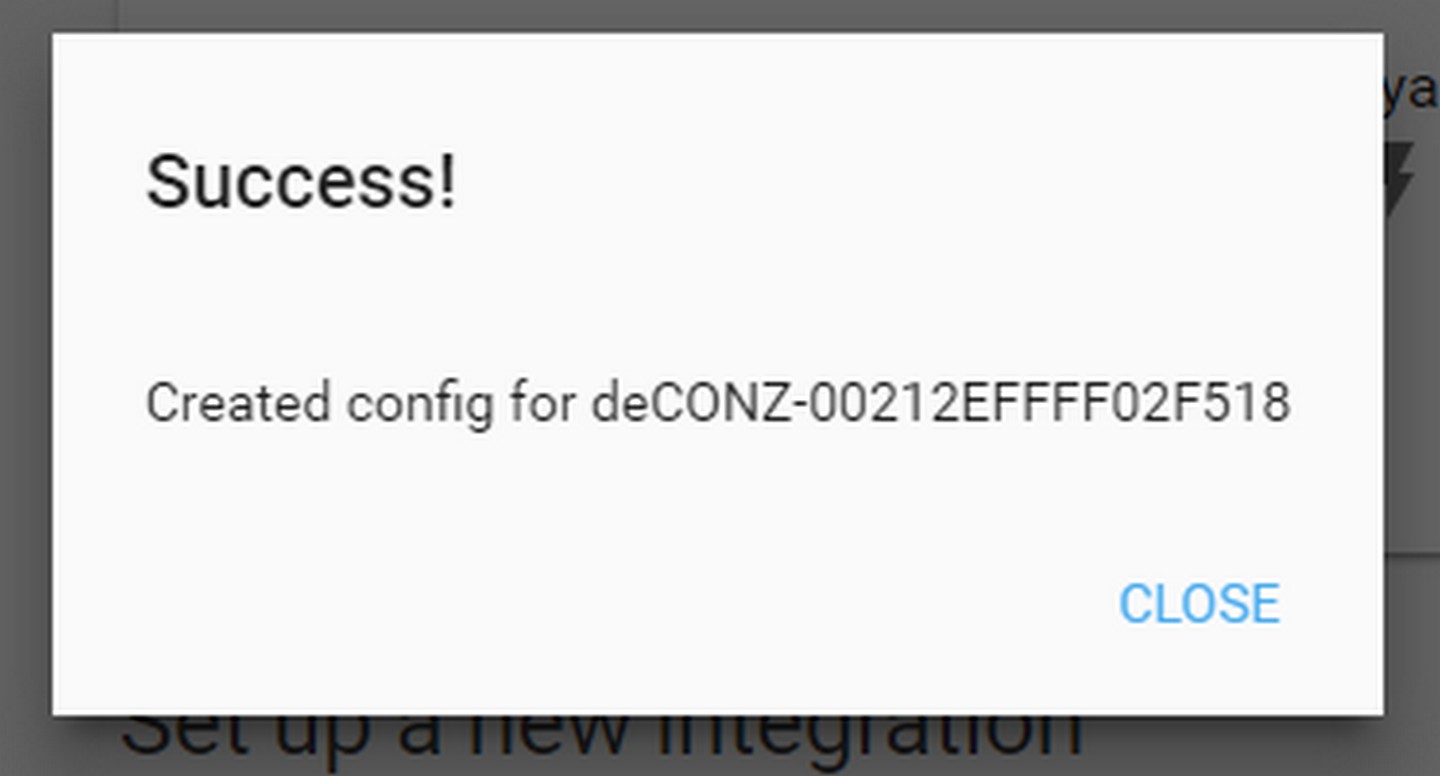
- Go back to Home Assistant again and click SUBMIT on the integration.
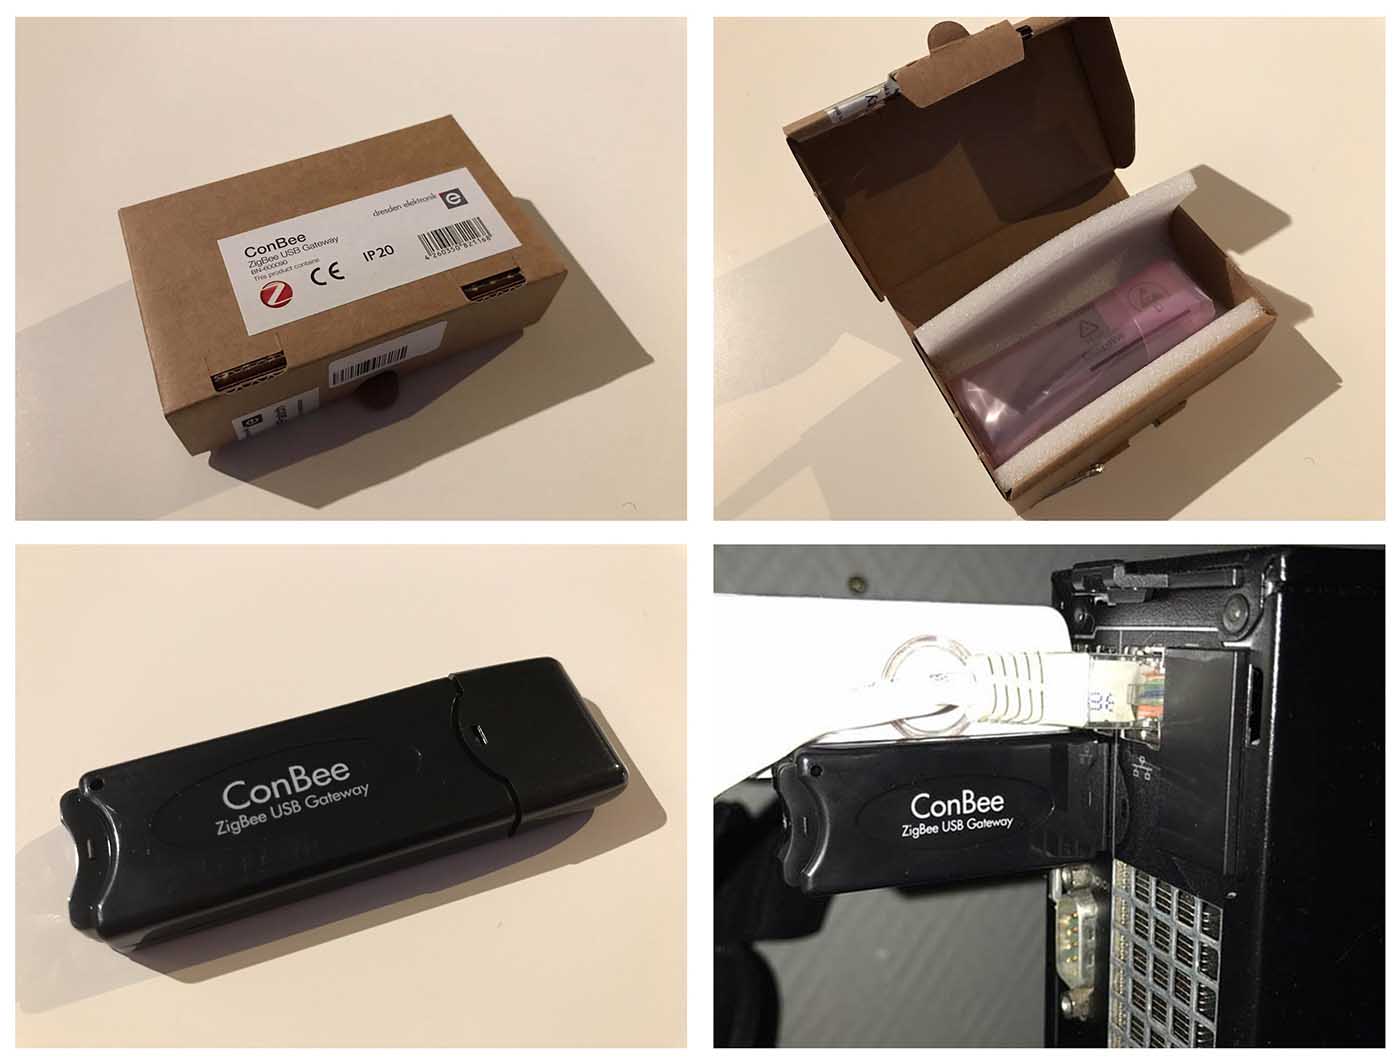
1. Plug in ConBee USB
2. Install deCONZ
See documentation here: https://www.home-assistant.io/components/deconz/
If you are using Hass.io, deCONZ should be available on Hass.io Addons.
I’m running HA in docker, so I installed deCONZ as a separate container. I copied the Docker-compose example from docker documentation, changed the ports, saved the file as Docker-compose.yaml and wrote «Docker-compose up» in the terminal.
3. Open deCONZ web-gui (Phoscon App)
After the container is running, you can access the Phoscon App from your browser, with IP-address to your server and port used in the Docker compose file.
The first step is to name your gateway and enter a password.
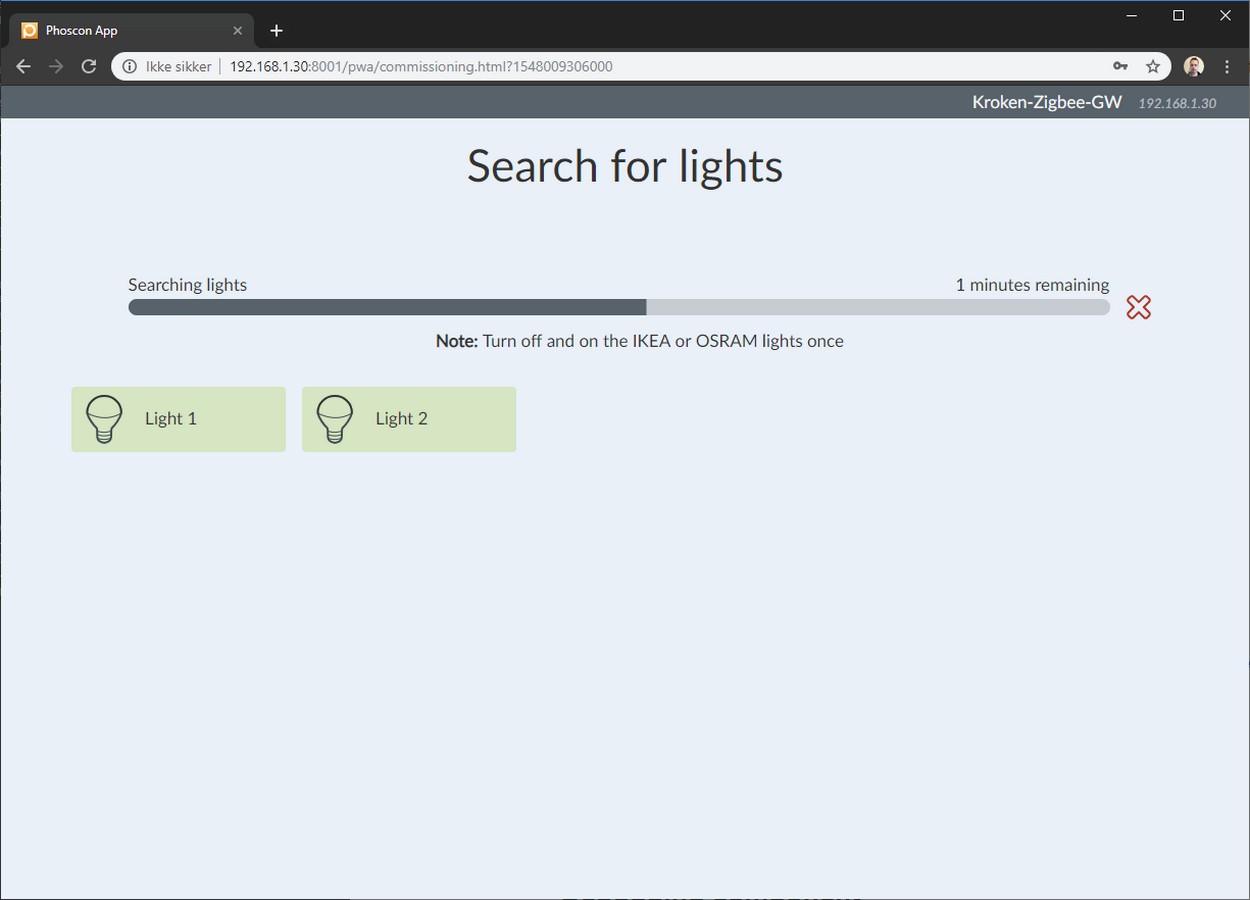
4. Add some lights, sensors or switches
Next step will only have one button to search for lights. I tried to cancel this process, but it kept going.
As it was searching for lights, I turned my floorlamp (with two bulbs) on/off 6 times, to reset the bulbs that was connected to my IKEA gateway. After the reset, I turned them off and on again, as described in the app – and deCONZ/Phoscon found them right away.
Configure the bulbs
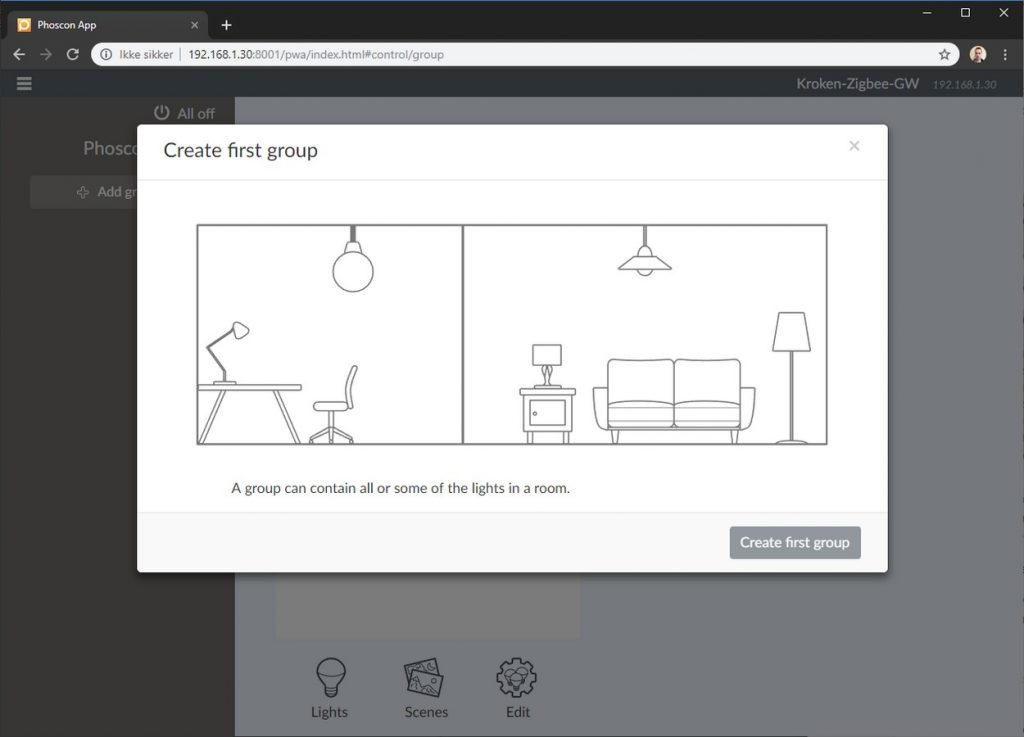
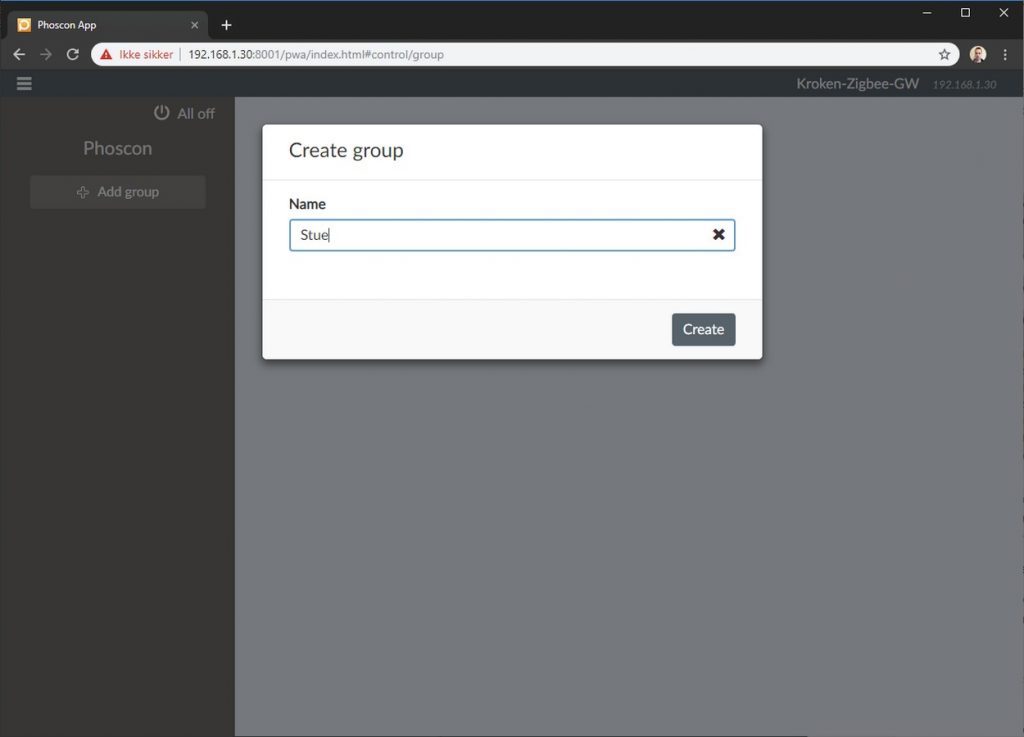
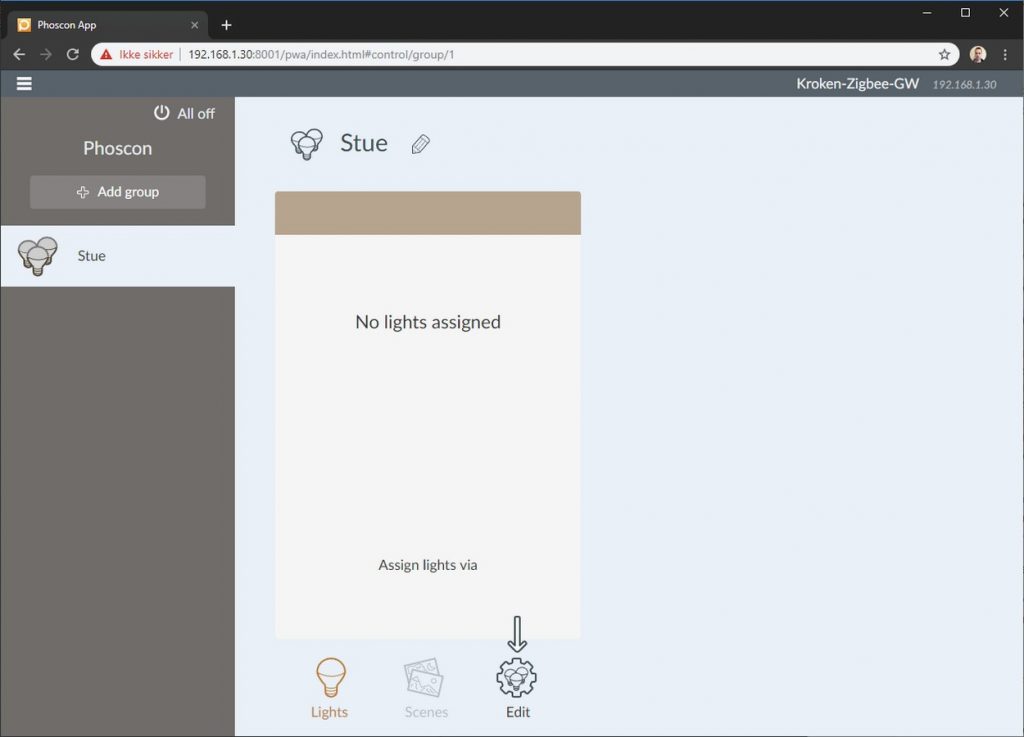
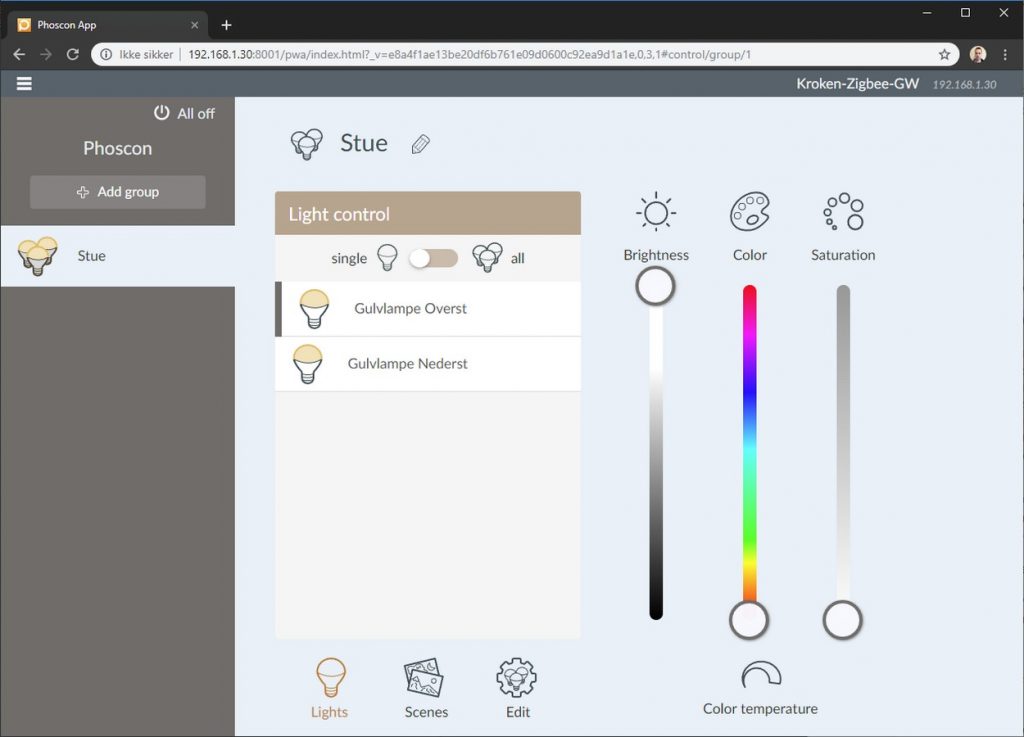
When the add lights wizard is complete, you will be asked to create a group/room.
You can then test the lights, edit their name, etc…

5, 6, 7, 8. Link deCONZ to Home Assistant
Linking deCONZ to Home Assistant is easy, but you have to switch between the browser tabs a couple of times.
First open HA. Navigate to Configuration -> Integrations, and click CONFIGURE on deCONZ Zigbee gateway.
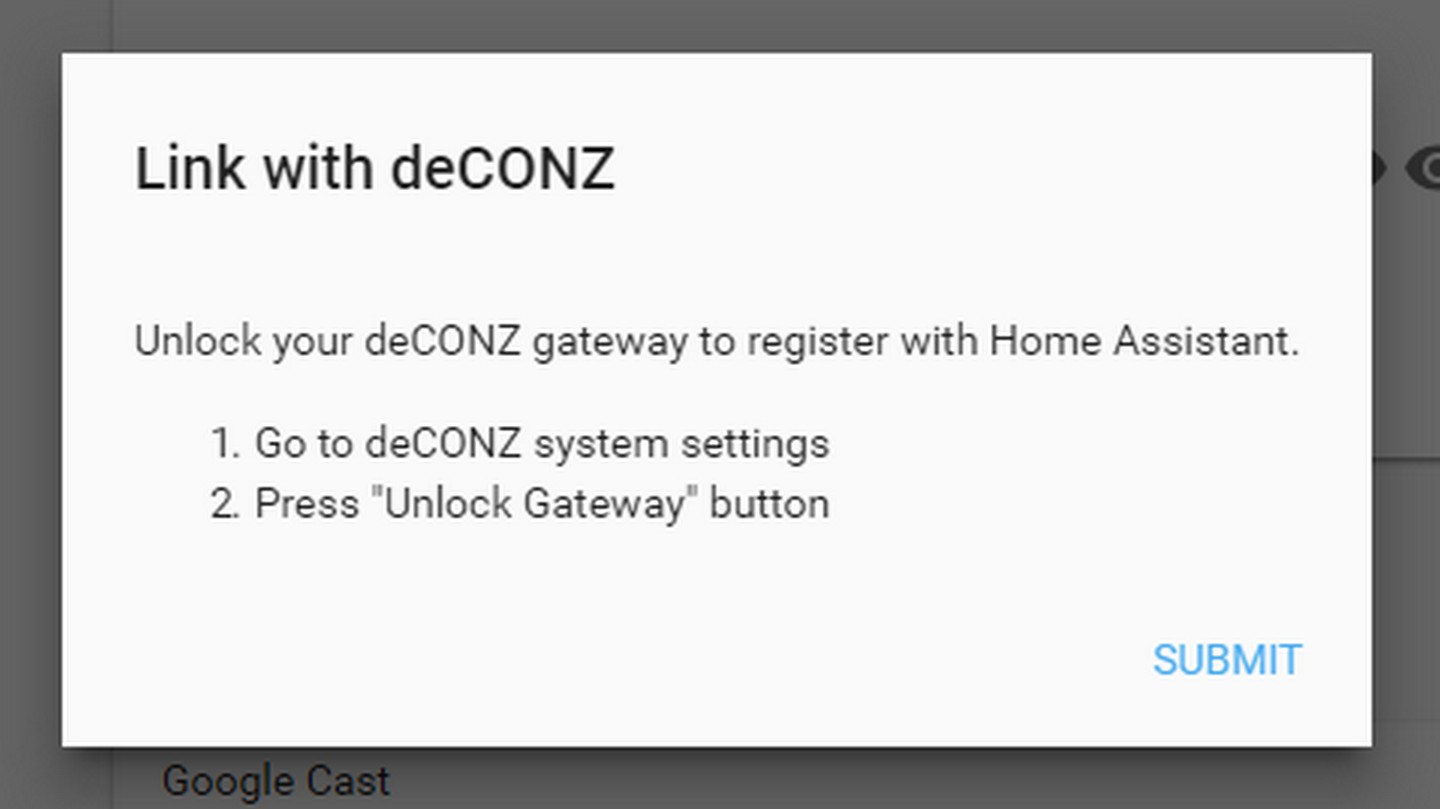
Looks like the «Unlock Gateway» have changed to «Authenticate app». After clicking this button, you have 60 seconds to navigate back to HA and click SUBMIT on the configure-dialog.


Troubleshoot
Broken Zigbee component?
I first tried to add the USB directly into HA with the Zigbee component. This was not successful.
I got this error in my HA log file:
…rialException: [Errno 2] could not open port /dev/ttyUSB0: [Errno 2] No such file or directory: ‘/dev/ttyUSB0’
2019-01-30 00:52:58 ERROR (MainThread) [homeassistant.setup] Setup failed for zigbee: Component failed to initialize.
When trying to validate the config, I got another error:
Invalid config for [zigbee]: required key not provided @ data[‘name’]. Got None. (See ?, line ?). Please check the docs at https://home-assistant.io/components/zigbee/
After some googling, I found that the Zigbee component is pretty much broken, and has been since march. Github issue: https://github.com/home-assistant/home-assistant/issues/13373
Finding the USB port on Linux
You can usually write ls /dev/ttyUSB* to find the port, but some USB-devices can be mapped as ttyACM0.
# ls /dev/tty*
/dev/tty /dev/tty17 /dev/tty26 /dev/tty35 /dev/tty44 /dev/tty53 /dev/tty62 /dev/ttyS11 /dev/ttyS20 /dev/ttyS3
/dev/tty0 /dev/tty18 /dev/tty27 /dev/tty36 /dev/tty45 /dev/tty54 /dev/tty63 /dev/ttyS12 /dev/ttyS21 /dev/ttyS30
/dev/tty1 /dev/tty19 /dev/tty28 /dev/tty37 /dev/tty46 /dev/tty55 /dev/tty7 /dev/ttyS13 /dev/ttyS22 /dev/ttyS31
/dev/tty10 /dev/tty2 /dev/tty29 /dev/tty38 /dev/tty47 /dev/tty56 /dev/tty8 /dev/ttyS14 /dev/ttyS23 /dev/ttyS4
/dev/tty11 /dev/tty20 /dev/tty3 /dev/tty39 /dev/tty48 /dev/tty57 /dev/tty9 /dev/ttyS15 /dev/ttyS24 /dev/ttyS5
/dev/tty12 /dev/tty21 /dev/tty30 /dev/tty4 /dev/tty49 /dev/tty58 /dev/ttyACM0 /dev/ttyS16 /dev/ttyS25 /dev/ttyS6
/dev/tty13 /dev/tty22 /dev/tty31 /dev/tty40 /dev/tty5 /dev/tty59 /dev/ttyprintk /dev/ttyS17 /dev/ttyS26 /dev/ttyS7
/dev/tty14 /dev/tty23 /dev/tty32 /dev/tty41 /dev/tty50 /dev/tty6 /dev/ttyS0 /dev/ttyS18 /dev/ttyS27 /dev/ttyS8
/dev/tty15 /dev/tty24 /dev/tty33 /dev/tty42 /dev/tty51 /dev/tty60 /dev/ttyS1 /dev/ttyS19 /dev/ttyS28 /dev/ttyS9
/dev/tty16 /dev/tty25 /dev/tty34 /dev/tty43 /dev/tty52 /dev/tty61 /dev/ttyS10 /dev/ttyS2 /dev/ttyS29 /dev/ttyUSB0
The ttyACM0 is my Z-wave stick, so my ConBee stick was most likely ttyUSB0. I tried to unplug the USB-stick and run the command again. As it disappeared from the list, I was sure it was ttyUSB0.